Monday, December 29, 2014

Deciphering Mainstream "Organic" fertilizers Pt 1: Chicken Manure Products

It's no secret that I have a real beef with using synthetic fertilizers in a garden. Not to name names but there are some pretty popular brands out there that are so successful at growing foods fast and furious that even the most devoted organic gardeners can get caught in their web of lies via the temptation of a bigger and faster growing crop.

Things get really confusing though when an aspiring organic gardener sees a plant fertilizer labeled as organic. Organic means good, right?! Well, not always... So I wanted to sum up a few of my personal reasons behind the bad taste in my mouth over these "organic" products.

First and foremost keep in mind that just like any other product labeling, these popular brand name companies are out to SELL to you .... not to take care of you.

The word "organic" can be used in the traditional, chemistry sense when not involved with the actual food products on the shelves at a grocery store. There is no USDA food regulation for labeling fertilizers as organic.

When you see an "organic" label on a fertilizer product.... it means that it's an organic compound in the truest sense.... not in the sense of it being USDA certified organic and safer for human consumption.

Here's an example. There are some dry, granulated "organic" fertilizers made entirely out of the bedding or litter used in factory farmed chicken housing. So what does that mean? That means these chickens who are processed and pumped full of antibiotics, GMO corn and growth hormones are housed on top a layer of material like wood shavings.
(image courtesy of CETFA)
After the chickens have been harvested for slaughter the bedding is removed with all of it's nutrient rich (and GMO, hormone, antibiotic rich) chicken manure, bagged up and sold as organic fertilizer.

YUM! .... yeah, not at all.

Now don't get me wrong! Chicken manure is a fantastic staple in the organic gardeners bag of tricks, but when that manure comes from factory farms there is NOTHING sustainable, organic, healthy or kind about it.

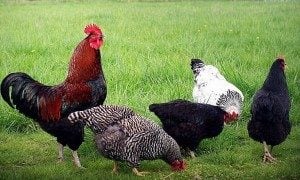
An alternative? Raise your own chickens (you really only need 2 or 3 for a back yard garden and you get eggs!), find a friend who raises chickens or look up local and humane chicken farms in your area.
Photo Courtesy of Backyard Chickens.com
Talk about how these birds are raised and what they're fed before adding the manure to your own compost. The extra effort is worth it! Yes it's true that these bagged, mainstream products will boost the growth of your veggies and speed crop production at mind blowing rates.... but at what cost? Is it worth it?


Saturday, August 9, 2014

Native Florida Crops: The Bird Pepper


This beautiful little gem of a pepper that will set your face on fire. The bird Pepper!
The bird pepper is native to much of the eastern US including Florida. Also known as the piquin or penguin pepper, it does very well in our hot, humid and wet summers and will thrive year round growing into a large, ornamental bush when left to do it's own thing. 

I may be exaggerating when I accuse if of facial combustion, but I don't have  a very hot-pepper-friendly kind of pallet. I can handle a little heat like an occasional jalapeno. However!!! These little flame bombs are several tens of thousands units higher on The Scoville Heat Scale than the humble jalapeno. They are still "mild" enough to actually have flavor to them. 

They're sweet and tangy somewhere under all of those Scoville units. The only way I know this is because of the way I prepare and preserve very hot peppers from the garden. I keep them is plain white vinegar in the fridge. No special preparation, just vinegar and peppers... example:

  1. take one glass jar
  2. add a hand full of bird peppers
  3. cover peppers in white vinegar
  4. put a lid on the jar and place in the fridge

I learned this method for keeping very-hot peppers from my great aunts who used to grow an abundance of cayenne and store them in old salad dressing bottles this way. After several weeks, the resulting liquid is a flavor infused vinegar that adds quite a nice kick to cooked greens like collards and kale. The vinegar keeps for well over a year and you can just continue to add fresh pepper to the jars or bottles as they're picked.

The juice from the bird peppers that  I have in my fridge right now is full of heat but also full of sweet flavor. Even for a heat resisting foodie like myself it's really quite delicious!

You can kick up the process and experiment by adding garlic cloves or dill seeds, but the basic method stays the same.

Photo Credit: Debbie from Banana Avenue
The peppers grow easily and abundantly in full sun and are fairly drought resistant but they do prefer a nice consistent moisture. The leaves are edible as a tiny, nutritious green that you can add to salads or sauteed dishes. The peppers grow from green to almost black to orange and then bright red. They're ready for picking or for falling off the plant and re-seeding when they reach the brilliant red color that make such an attractive ornamental. 

Photo credit: Debbie from Banana Avenue

You can also dry the peppers and grind them for use in chili's or as a topping for pizza or wherever else you like a nice dash of heat. 

SO as far as edible ornamentals go, the Bird pepper is a fantastic addition to any Florida yard-scape, garden or permaculture system. It's always best to plant edible natives when possible. They require very little maintenance and really aid the ecosystem because they actually LIKE it in Florida. You wont have to fight it to keep it alive and it's a great plant for a beginner gardener!


Thursday, July 24, 2014

My design for mobile greenhouse planters!


I've been thinking about how exactly to go about growing food on the Manic Organic bus for a couple of years now. Sort of weighing my possibilities and options for the space.

As was was falling asleep one night, a few months back... I had an idea! Cement mixing trays, funnels, tubing and viola!! We'll have planters!


I asked my good man to build me some wooden frames from the scrap lumber and pallets we had laying around. He built them to fit the plastic cement mixing trays and I drilled a single hole into the bottom of each tray.


We purchased plastic funnels and put one in each hole, fixing them in place with some silicone


 These funnels will attach to drain hoses underneath that will divert excess drainage into buckets hidden behind the curtains.


 The excess water that drains from the trays can be reused as it's collected. I do plan on having a worm bin in the bus as well so it could also be used to moisten the worms habitat when needed. Everything will be fairly self sufficient on board!
 I fastened mesh cages from some old aluminum screening we had salvaged from something , somewhere (re-use and up-cycle whenever possible!) This will keep the soil from falling through the funnels and clogging up the whole system


I've decided to use lava rock for the bottom of the trays. It's fairly inexpensive and lighter than stone or gravel. We need to keep the weight to a minimum so things don't get too top heavy even though the wooden frames will be secured to the walls before we drive anywhere.

The rock will fill the trays up to the level of the tops of the funnels, creating a reservoir space for water to collect. If the water level goes over the top of the funnel then it will drain out so nothing can get flooded or too saturated. This is very similar to how an earth box works. When you have the constant moisture available to your plants they really thrive. Plus the lava rock will also provide some air space for roots.  The soil will go on top of the rocks and fill the trays nearly to the top. I haven't gotten that far but I'm so excited about our progress that I had to share where we're at so far!


Transforming The Manic Organic Mobile


My very first event, all set up and beautiful!
 The Transformation of my bus over the last few years has been on of the most thrilling and fulfilling projects I've ever embarked on. throwing caution to the wind and chasing a dream is something everyone should try at least once. Yeah I lost a ton of money and yeah I've been pretty broke for a while because of it, but I've learned so much from this process and I'm still learning.

I'm evolving and changing my ideas and implementing back up plans all along the way. I've never thrown in the towel or given up on this project.

As much as I enjoyed selling locally sourced, organic produce out of my bus at various events and markets the competition with conventional produce and my insistence on staying local and serving MY community was a losing combination.

There are too many cheap, conventionally grown produce stands in our area. They sell fruits and veggies from Mexico and china and they're a fraction of the price of the quality organic that I was selling. They're also riddled with pesticides, usually weeks old and rather flavorless.

Time and time again, however, people chose to go with what cost less out of their pocket. You just CAN'T make people care about the quality of their food. It's depressing...anyway...

The worse part is that often they lie to their customers and tell them that what they're buying IS local and organic. Even with the original packaging in plain sight. The frustration and profit loss I suffered competing with these guys was too much. So I shut down the operation and moved on to plan B.

I decided the best way to combat these fraudulent produce vendors in my neighborhood would be to help connect existing, local growers who have conscious and sustainable food growing practices and to help others learn how to grow food in our climate.

The result has been plant and seed swaps twice a year, gardening workshops, home garden consultations, facebook pages for local growers and supporting home made food and craft swaps in our south Sarasota County area.

I feel very accomplished with how things have been coming together and working out! I'm helping more, unused space become filled with food growing goodness in my community and I'm helping connect like minded people. Together we're forming quite a nice sub-community of people who care deeply about the food they eat and the soil it's grown in.

As for the bus! Well, I'm turning it into a mobile greenhouse now! the interior will now house growing containers for organic veggies and I'll take my bus to all the same events and markets to help teach people the the most inexpensive food comes from their OWN back yard.

I'll be blogging the progress as I go! It's very exciting and I'm totally stoked and ready to get things done! To see more photos of the bus and how things are evolving please check out the photo gallery on my website by clicking HERE!


Wednesday, June 25, 2014

Anatomy of a sprouting seed: An at-home science lesson

This is a simple and fun science project that I used to do with pop corn kernels when I was a kid.
It's a great lesson in seed anatomy and can be applied to a botany or biology lesson plan or just done for some educational fun!

The Materials you'll need are things you'll most likely have around the house:

-A clear glass or plastic cup that you can easily see through.
-A paper towel folded to match the height of the cup
-1/4 cup of filtered water
-corn kernels (I'm lucky enough to have some heirloom varieties on hand, but bagged popping corn from the store works great too! Just not the microwave kind)
-A dry erase marker
-A notebook to keep track of the day to day growth and draw pictures of all of the parts as they grow. Use the internet to look up some seed anatomy charts especially if you're sprouting more than one kind of seed


Sunflower seeds will also work great and they have a different anatomy than corn seeds do, so to further the experiment it would be fun to set up two or more different seed types and track the sprouting and growth rate differences between them. Also note and research the differences in the seed anatomy as they sprout and grow! For this post I'm just using one kind of seed. Red corn.

Your going to take your folded paper towel and line the inside of the glass, pressing it tight up against the sides so it's not loose in the glass.

Next you're going to pour your 1/4 cup of filtered water into the bottom of the glass and let the towel wick it up. You should have extra water at the bottom of the glass, if not then add enough so there's about a 1/4 inch of water left unabsorbed by the towel.


Then gently place your seeds between the glass and the wet paper towel about halfway down the side of the cup. Press the towel a little more to make sure they're snug in there. You can have several seeds in one cup, just space them about an inch apart. Use the dry erase marker to write the date on the glass. You can also number the seeds to track which one sprouts first and if you have some competitive kids in the house you can make a race out of it! Each kid can pick a seed or two and root (pun intended) for their seeds to grow the fastest over the next few days!


My seeds started showing activity after about 36 hours! Pretty fast right? This is all the stuff that normally goes on underneath the soil so it seems like it takes much longer for seeds to sprout .
The first root, or radicle, emerges from the coleorhiza which is a protective sheath at the end of the seed.


In this photo you can see the first little radicle emerging from the kernel on the left.
After another 24 hours we saw the first signs of the coleoptile, which will grow to form the foliage of the grass-like corn plant.

At this point most of the kernels had some sort of action happening, but not all of them! This shows why it's important to plant multiple seeds when you're sowing for crops. Sometimes seeds just don't sprout at all so it's good to have back up!


On this seed the little coleoptile seems to have gotten a little lost in trying to find it's way UP, but it only took a few hours for it to right itself and get headed in the direction it needed to be.


After 4 days the radicle on all of the sprouted seeds is very apparent and starting to really look like a nice set of roots!


on day 5 after setting the seeds in the glass, the sprouts have reached the top of the glass. This is normally when we would see sprouts breaking through the soil if these seeds were planted in a garden!

On day three I did set them in the sunlight for a while so they would produce chlorophyll and turn green. I also had to add more water, about another 1/4 cup, because the sun helped dry up the water.

Don't let your paper towel dry out! The corn will continue to grow in the glass for several days. You can transfer them to some soil when you're all done tracking the growth of what goes on behind the scenes. Plant them with the paper towel and all so you don't damage the root system.


Have fun and experiment with different seeds! This is a great indoor activity for the hot summer months and your kids will enjoy keeping track of their own seeds as they grow!

Tuesday, June 17, 2014

Raising Earthworms for Composting and Making an Upcycled, Easy Worm Bin

I've been raising my own earth worms for a couple of years now and the nutrient rich compost they create is now such a vital part of our garden routine there's just no going back!

We use the compost in everything we plant. We use it to amend new beds and old beds and we always have worms on hand to put in our container gardens and raised beds to help keep the soil alive and healthy.

First off and probably the number one plant loving worm factor is MORE NITROGEN! YAY!
Worms feed on plant debris (dead roots, leaves, grasses, manure) and soil. Their digestive system concentrates the organic and mineral compounds in the food they eat, so their castings are richer in available nutrients than the soil around them. Nitrogen in the castings is readily available to plants. Plus, worm bodies decompose rapidly, further contributing to the nitrogen content of soil.

Worms also help soil drain AND retain water more efficiently. They tunnel constantly acting like tiny little garden plows always turning and moving the soil around them while replenishing the nutrients with their castings as they go. Worm casting also retain moisture better than the soil around them.

Adding worms to an already established compost pile will speed the composting time tremendously!
Or you can create your own little worm haven and set up a worm bin for your little friends to call their own.

Worms love to eat all sorts of things Coffee grounds, veggie scraps and  rabbit poop (big favorite!) are the primary foods we offer our worms. We keep a bucket in the kitchen to collect these things (ok , not the poop... that stays outside) and every other day or so we split the goods between the worms and the compost pile.

There are things you'll want to avoid feeding your worms because they can be too acidic or they can cause stink and invasions from other pests. Oils, dairy, meats and citrus are good examples of what to avoid.

The set up I'm going to share with you here is made entirely out of supplies I already had laying around the house and yard.Why buy new when you can reuse, right?
 It was my first set up so it was a learning experience and I want to share the good and the bad about my impromptu design so you can learn from my mistakes as well as my sucesses!
 This isn't a detailed set up that you need to be strict with. It's a guideline showing the basic components that help make worm composting easy!
I started with a large, old tote bin. The bin will need drainage so you'll have to drill a couple of holes in the bottom. In my case with this bin there were already cracks in the bottom. I made the cracks a little bigger and placed two upturned pots over them. Ideally, some screen or mesh would work better here, but I didn't have any at the time. The idea is to have proper drainage without the organic material and worms falling out. The pots worked OK, but I did have to check my catch bin underneath periodically for escaped worms.
Here you can see how I took a smaller bin to use as a catch bin underneath to catch the nutrient rich drippings from above. I just used two boards to hold the larger bin. The downsides here were all made possible by the weight of the main bin itself. Over time the lower bin gave out and got crushed and lifting the heavy bin to retrieve the drippings got old, fast. But it worked in achieving the desired, basic set up!

I put a nice, thick layer of leaves in the bottom that covered the pots then I cut some half rotted oak logs and lined the bin over top of the leaves. The idea here is to create a natural environment for the worms. They love all things rotten and decomposing, plus the logs provide air spaces and places for the worms to dig in and hide. On my second bin set up I used shredded junk mail within these layers. Great way to keep some garbage out of the landfills and the worms make surprisingly short work of paper products!
you'll need to wet each layer a bit as you go. Worms need moisture, but flooding them out all at once can drown them, so it's better to maintain an overall moisture than to drench it at the end.
This also provides an opportunity to check your drainage!


The next layer should be a very thick layer of compost. If you don't have compost of your own, a store bought bag will do. Here I repeated the first two layers also, which was a bit of overkill with the second layer of logs but the worms really loved the extra logs so it wasn't a failure. The logs just made it difficult to dig out the compost/castings later on. But the worms were happy so no problem! Remember to water the layers as you go!
And time for the WORMS! YAY!! I purchased these guys from a bait shop in town. It's very important to get worms that have been locally raised! For example, if you live in Florida like we do... don't purchase the worms that come out of a fridge! Those worms are most likely from Canada and will die in our hot climate. These worms are red wigglers and were raised in Arcadia, Fl so they're perfect! I started with about 40 worms.

At the end, you'll want to add some food. Squishy things are good to start with like banana peels and rotten or baked sweet potatoes. Cover them slightly with a layer of the compost to avoid too many flies. Don't add a ton of food, just a few things to get them started. The worms will be able to feed on the compost as well so until they've had a chance to reproduce and get their business going just start them slow.

Ad a layer of paper to help retain moisture and keep the flies out. This paper will decompose pretty quick so you'll need to replace it periodically. The a lid that allows ventilation... like this broken one. They don't need a ton of ventilation but don't use an airtight container unless you can open it up several times a day EVERY day to let fresh air in.


Put your bin in a shady area to keep it from getting too hot. Also, if you live in a freeze prone area you'll need to be able to move your bin inside during the winter months. 


This set up lasted a solid year for me before it broke down beyond repair. What I learned from it was that I needed screen in the bottom to keep the worms in and the drainage flowing. Most importantly I learned that I needed a solid base for the main bin with an easily removable try to catch the drippings underneath...
So here's Cheri's worm bin 2.0:
My good man build me a simple stand for the heavy bin out of wood we found along side the road so now instead of lifting the bin to retrieve the drippings, I just pull the drawer out... and it really is a drawer! Another trash picked / repurposed item. The whole thing stands less than 4 feet high and our worms are thriving in their new home!

 How we harvest our castings is easy... we'll go a week or so without feeding the worms and scoop out the compost (making sure it's free of food scraps), often times worms and all, and add them to the garden, to potted plants and to the compost bin. As for the drippings ... we collect those after "weatering" our worms. We water them gently once in a while to keep them moist. Only about a half gallon gently sprinkled over top. We use about a cup or so per gallon of fresh water to water on and around plants. This actually helps keep pests and diseases at bay too! I don't recommend using the full strength drippings as they can potentially be too strong for tender plants.

As with so many things, sometimes it's best to just dive in and work out the details as you go along. Worm composting is a fantastic addition to any organic garden! The benefits are almost endless and it's a really great project to do with kids!

So gather your supplies and have a go! let me know what your worm bin looks like and the materials you used!

I spent about 4 dollars on the worms themselves and that was it. Everything else was 100% repurposed! with a little time and some thinking outside the box you can pull off a lot of garden projects with nothing out of pocket!

If you're a local to Sarasota county and you need worms, I can totally hook you up!
Good luck!


Wednesday, May 28, 2014

Grain free, Gluten Free Buckwheat: Simple Flatbread


 Buckwheat is a remarkable food. It's versatile, highly nutritious and delicious!
Contrary to it's name, buckwheat is not wheat at all, it's actually a fruit seed that is related to rhubarb and sorrel. It's high in manganese, magnesium and fiber and low in calories.
One cup of buckwheat contains only about 155 calories!


You can find raw buckwheat groats in the bulk or dry goods section of your higher end grocery store like whole foods or earth origins. It's very affordable at around $2 per pound.

This recipe is really simple and can be used as a sturdy pizza crust or cut into flat bread for a side dish, sandwiches or just toasted with cheese.
 What you'll need:
-One cup raw buckwheat groats
-One cup filtered water
-One large, humanely sourced egg (preferably from a happy, backyard chicken)
-Parchment Paper
-A cookie sheet
-A glass bowl or jar
-Sea Salt and herbs of your choice. I'll be using fresh rosemary and home made garlic sea salt
 your going to need to start at least 3-4 hours ahead of time because you'll need to soak the groats for quite a while. You CAN soak them over night, you really don't need to worry about over soaking them. They do sprout pretty quickly which is a good thing. So if you'd like to take it the extra mile, go ahead and give them a full 24 hours of soaking. Sprouted groats are more nutritious and easier to digest! Soak them in about 3/4 of a cup of filtered water. They'll expand and get a slimy, sort of gross texture to them but that's ok too! You'll see that they expand quite a bit and soak up all of your water, like in the photo here, before soaking on the left and after soaking on the right.


Scoop them out into your blended and add the remaining 1/4 cup of filtered water along with your egg, herbs and sea salt. I like to use about a half tsp of salt. Blend until smooth, or 2-3 minutes depending on how awesome your blender is.
Pour the slurry onto a parchment lined cookie sheet. It going to be a liquid about the consistency of pancake batter.
Spread it around so it's about a 1/4 inch or less thick and place into the oven, preheated to 350°
Bake for 20 minutes.

You'll have a sheet of flatbread that's perfect to use for pizza! Top it with your favorite pizza goodies and re-bake it for 15-20 minutes!

You can also cut it into triangles and use it in place of pita or traditional flat bread. 


It's surprisingly fluffy and sturdy enough to handle the bulkiest of pizza toppings without falling apart! The flavor is slightly nutty on it's own but any fresh herbs you use will really pop! I also like to toast it as a breakfast snack with organic butter or jelly.

Seriously, if you've been looking for an easy to make, delicious and grain free bread alternative you've GOT to try this out! If you do, please let me know how you like it!
Enjoy!


Friday, May 16, 2014

Florida Gardening: Tropical Pumpkin AKA Calabasa

 Last Summer I discovered an adorable little pumpkin.
One that grows and thrives in our harsh, tropical climate while producing an abundance of tasty, fast growing gourds.

It's called Calabasa, or Tropical Pumpkin! I prefer to call it Tropical pumpkin just because I REALLY love being able to say I grow my own pumpkins! It's not something you hear often in SW Florida (Zone 9)

I purchased a small sack of seeks from ECHO in North Fort Myers on a whim, while I was attending one of their fantastic Farm Days!

I planted 4 seeds mid August and three sprouted, slowly forming a little circle of Pumpkin vine over the next couple of weeks.
Cute, right?! It started sending out these lightening fast growing tendrils every which way! I had to start training it to stay out of other beds and pathways. Every day these vines would gain a foot or so of growth.
Well, once a couple of summer time rains fell and really got this beast going it was all over the place! And that's a good thing! It's beautiful and broad leaves make a really nice ground cover.

By Thanksgiving we had enough mature pumpkins to trade with friends and family and to make some of the BEST pumpkin pie I've ever tasted! In the beginning I was very impatient and I picked them while they were still green. Which led to seed saving failure. The squash themselves were still totally great for eating, but the seeds weren't viable.

So I learned to let them stay on the vine until they started to blush and turn yellowish pinkish. Almost the color of a butternut squash but still some green on the skin.

Now I have seeds to share with my Florida gardening friends and family too! Which is very exciting to me! I'm so in love with this squash that I want to share it with everyone!

During the short days in the winter the vine died back a little. We got a touch of frost that killed off a lot of leaves. I just left everything to die where it stood and re-nourish the ground with the composting, fallen leaves.

In late march/ early April the vines came back with a vengeance! Here it is mid March and I've just harvested 8 squash of all different sizes!

Once I planted these seeds back in August I have not had to feed the vines once. They grow all over the place and I water them with everything else. They need zero special attention!

They do seem to like  morning shade and afternoon evening sun. I have a vine in a different location that was full sun and it really didn't do nearly as well.


It's a simple and very rewarding crop! The only pest I've encountered has been a rat here or there. They like to slip in at night and nibble just enough to wreck a perfectly good squash! Very aggravating, but not such a nuisance that I've needed to retaliate... yet.


I like to cut the tops off like a jack-o-lantern and scoop out the seeds. Then I roast them for about an hour. This makes it so you can either eat it as is, with some maple syrup or butter, or you can scoop out the flesh to blend into a puree for other recipes. Treat it like you would any large squash! It makes amazing soup, bread, pie and stands alone as a very yummy side dish!